While generative AI has produced some laughable results, artificial intelligence has reached the point where it can manage annoying repetitive tasks in a short amount of time. For photographers and other visual artists, one of those irksome repetitive tasks that software could take over is the process of removing objects and replacing them with something else. Such an AI-based tool is already inside a program many photographers know: Photoshop. The new Photoshop generative fill uses AI to fill a gap in a photograph.
Related
My 5 must-try Photoshop tips to edit photos in 5 minutes or less
Photoshop is a powerful editing tool but it’s easy to get lost in all the different tools. Here are five tips for quickly editing your images.
While Photoshop’s generative fill can be used to also remove objects, Adobe has since launched an AI-powered remove tool. That’s the better option for removing something from a photo, where generative fill is the best choice for creating something entirely new in an image. However, the more I’ve experimented with Photoshop generative fill, the more I’ve realized there’s a trick to getting the best results from the generative AI. If you are ready to save hours of editing, here’s how:
How to use Photoshop Generative Fill
Generative Fill starts with making a selection in Photoshop
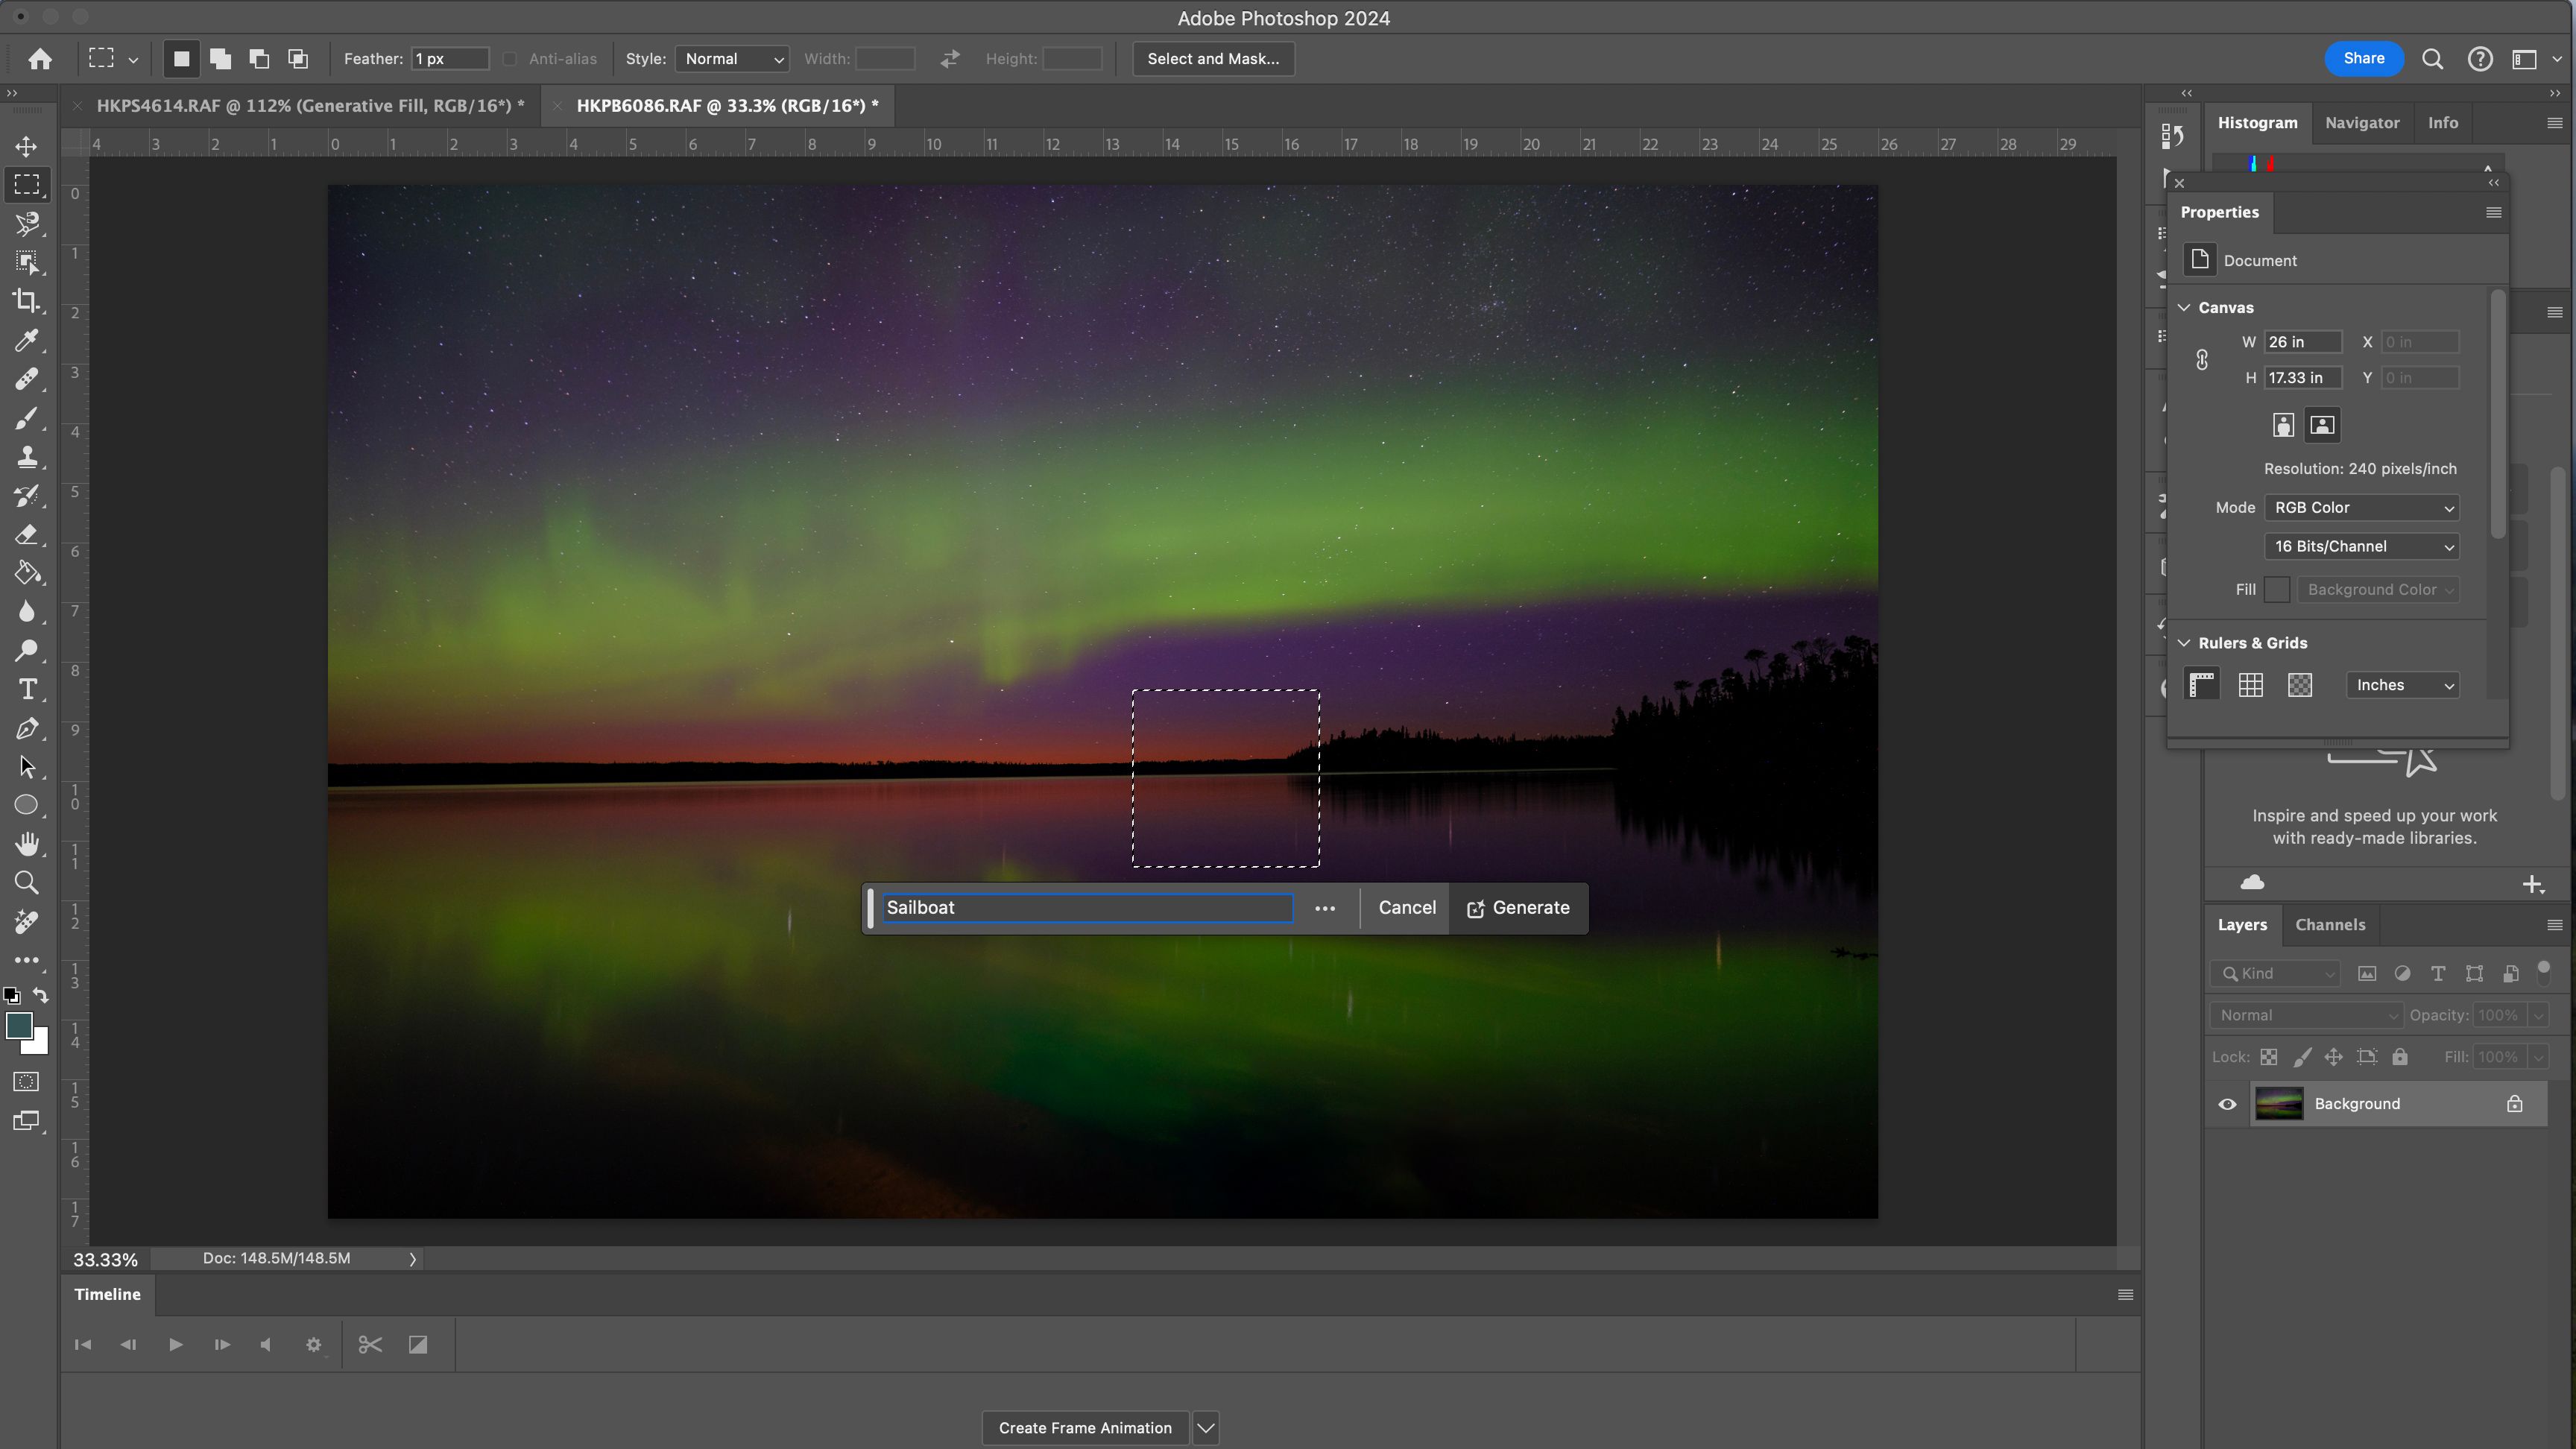
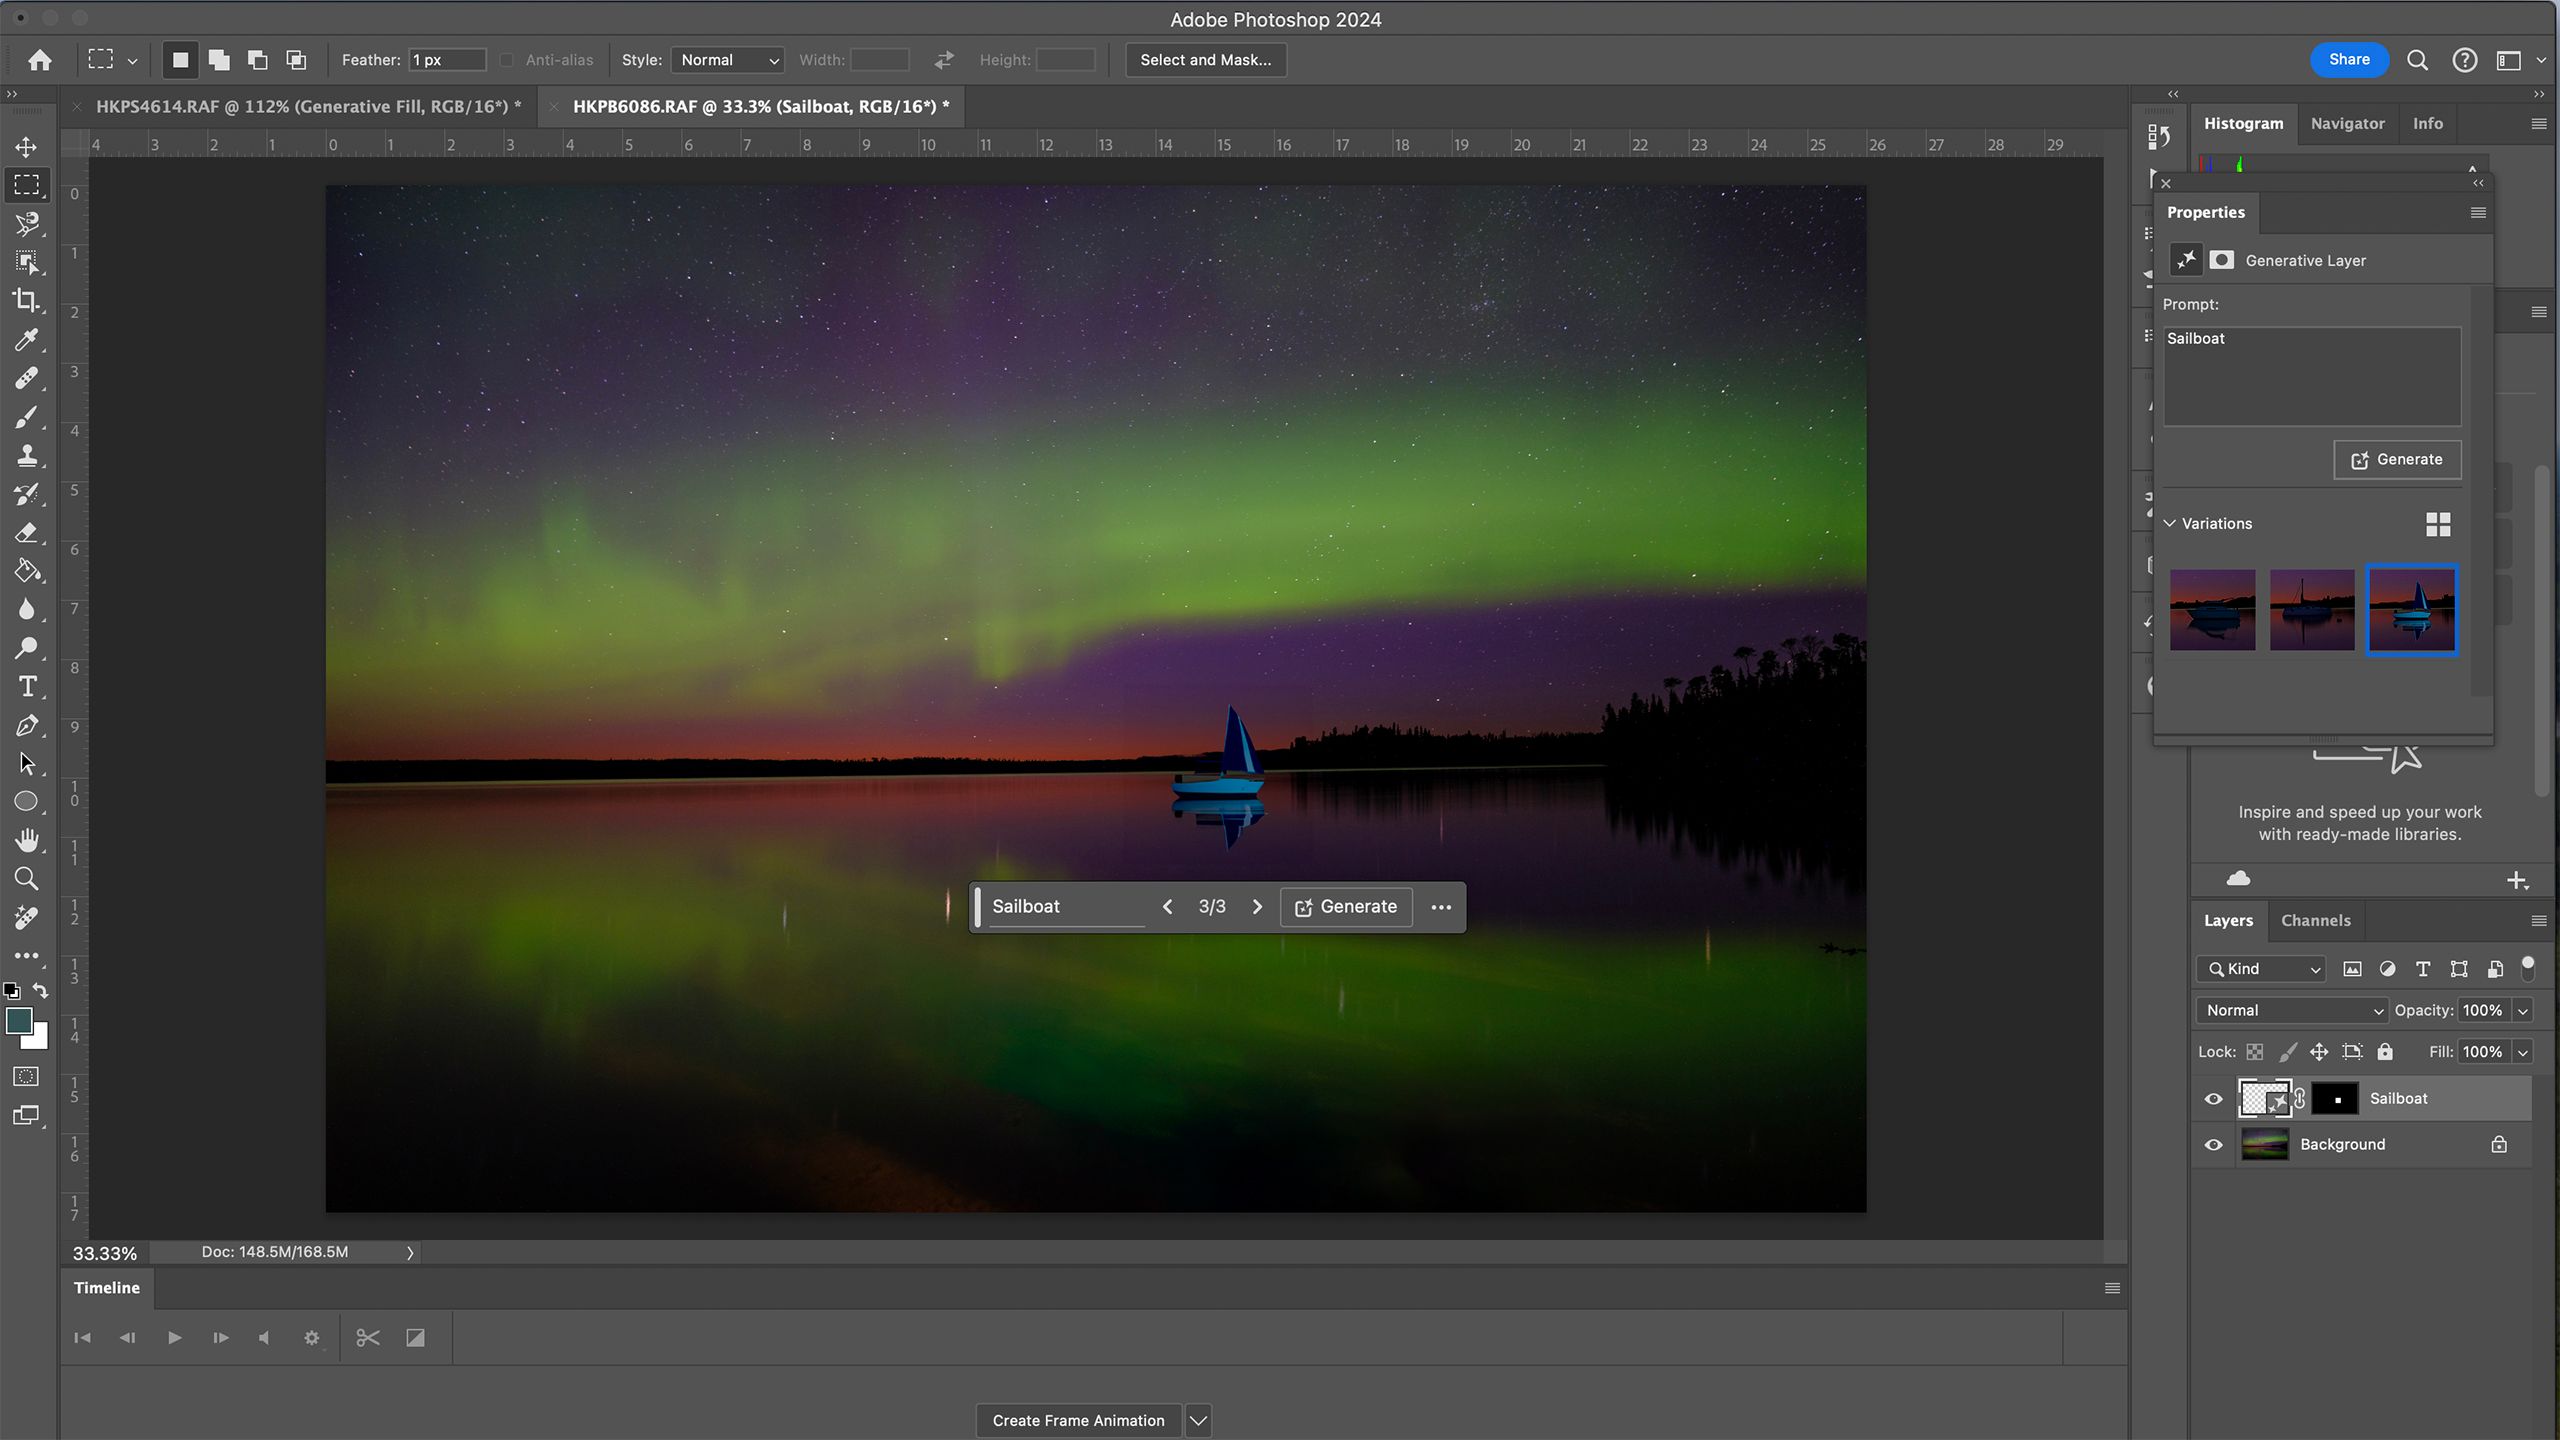
Originally available only as part of the Photoshop beta, generative fill has since launched to the latest editions of Photoshop. To use the tool, you’ll need a subscription that includes Photoshop, like one of Adobe’s photography plans. The AI is also too data-heavy to run on the device, so you’ll also need an internet connection.
Once you have the latest version of Adobe Photoshop and Wi-Fi, you’re ready to use generative fill.
- Open Photoshop.
- Open the image that you would like to edit (File > Open). Alternatively, you can start with a blank document and use the AI to generate objects onto a blank canvas.
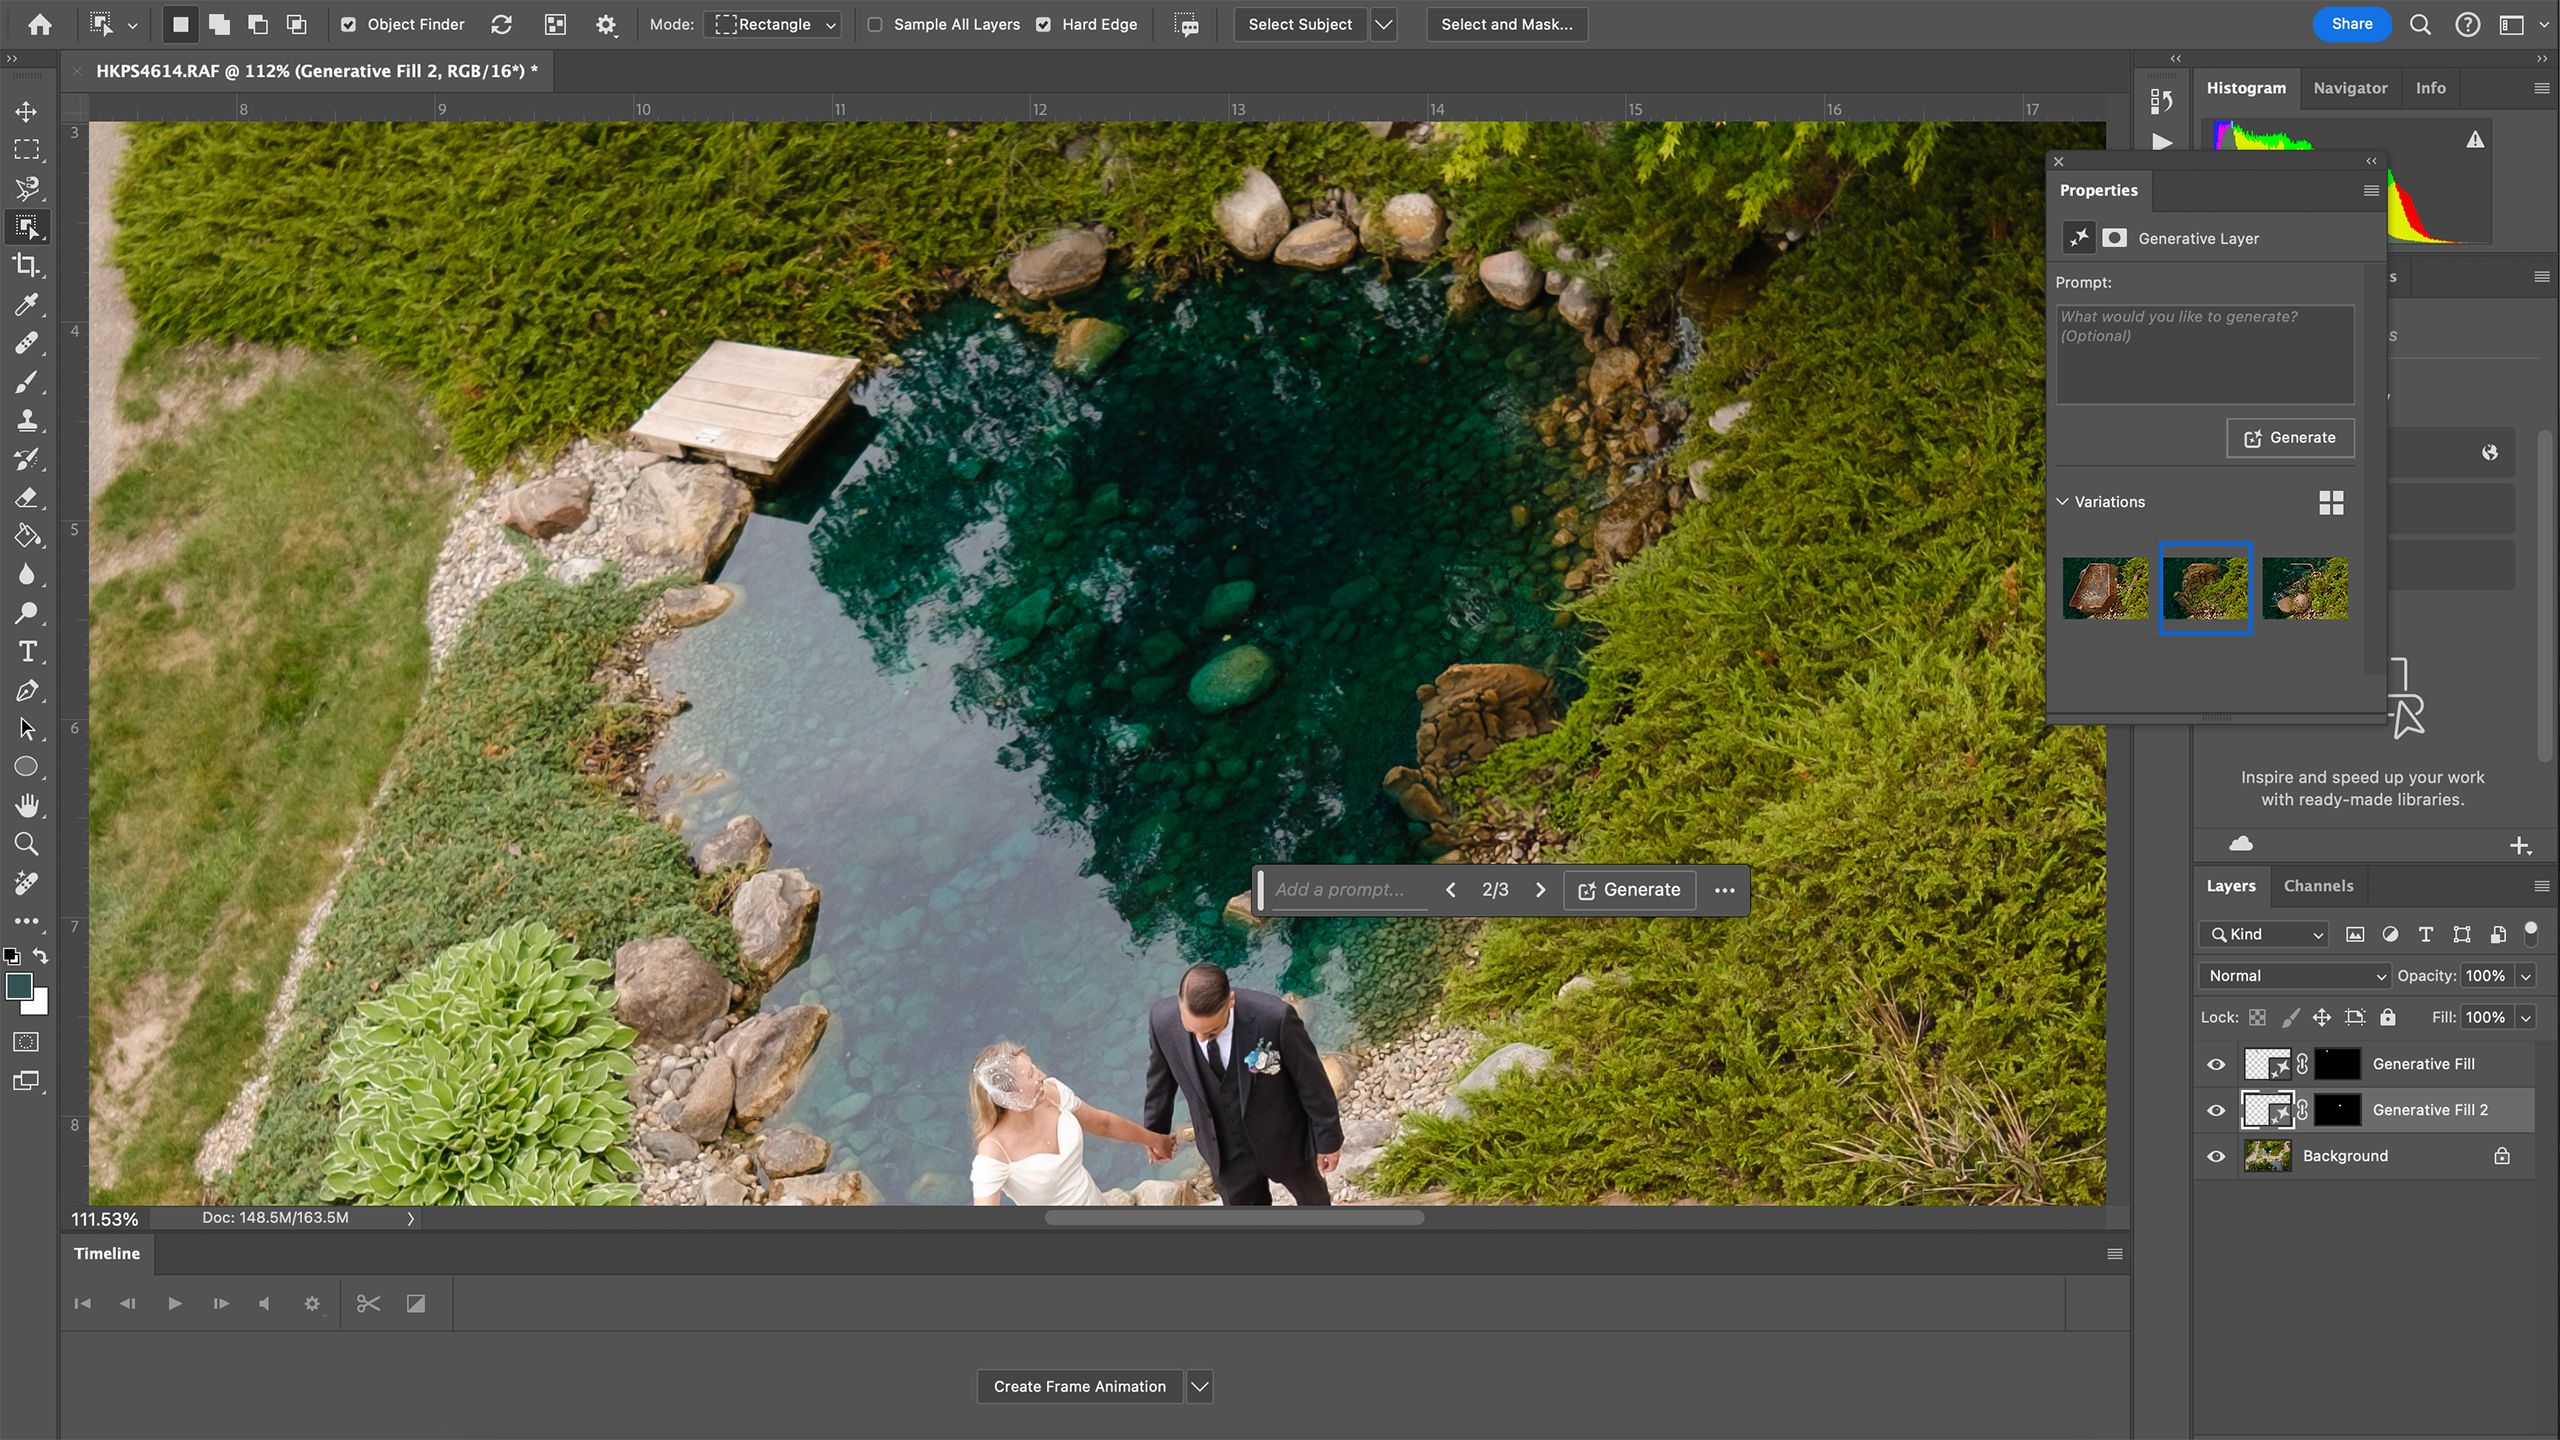
- Use any of Photoshop’s selection tools to select the area of your image where you want to replace or add an object. Some great selection tools to use include:
- The object selection tool, to select one irregular-shaped object with Photoshop’s help at detecting the edges.
- The rectangular or elliptical marquee tool (dotted box icon) selects a rectangular-shaped or circle-shaped area of the image.
- The lasso, polygonal lasso, or magnetic lasso tool selects irregularly shaped objects.
- The select subject or select background tool automatically selects the subject or background of the photograph.
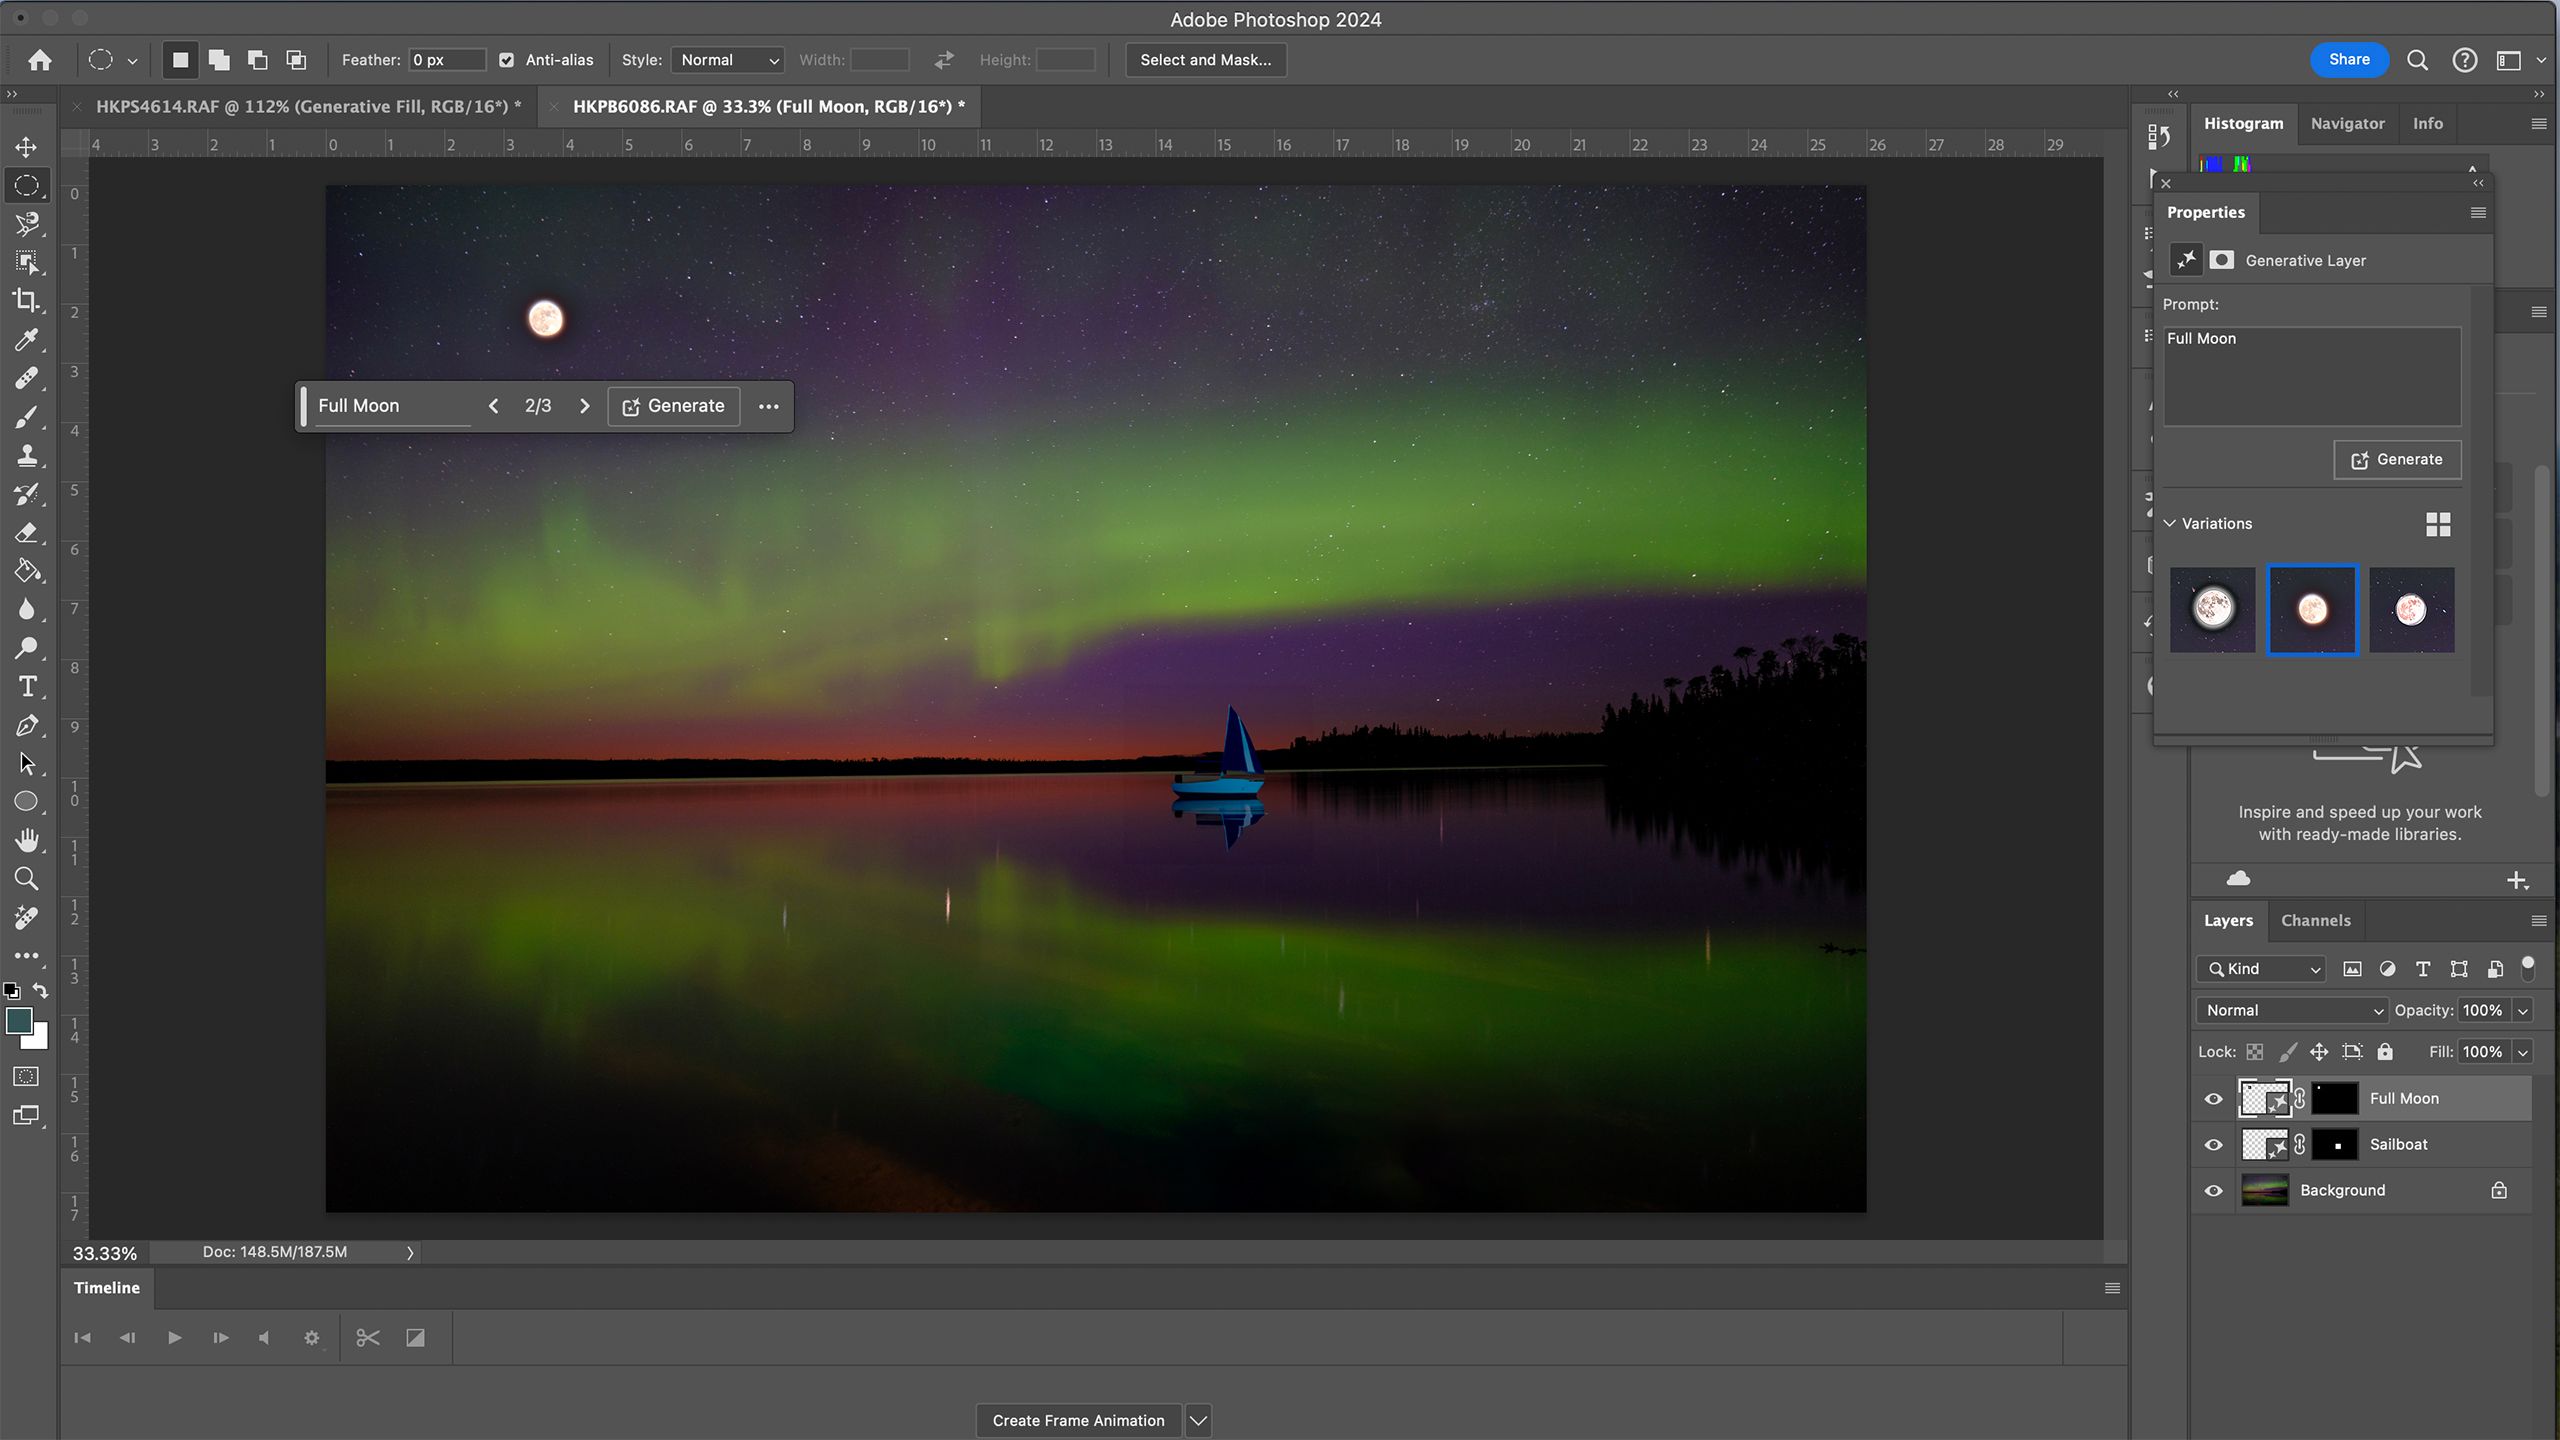
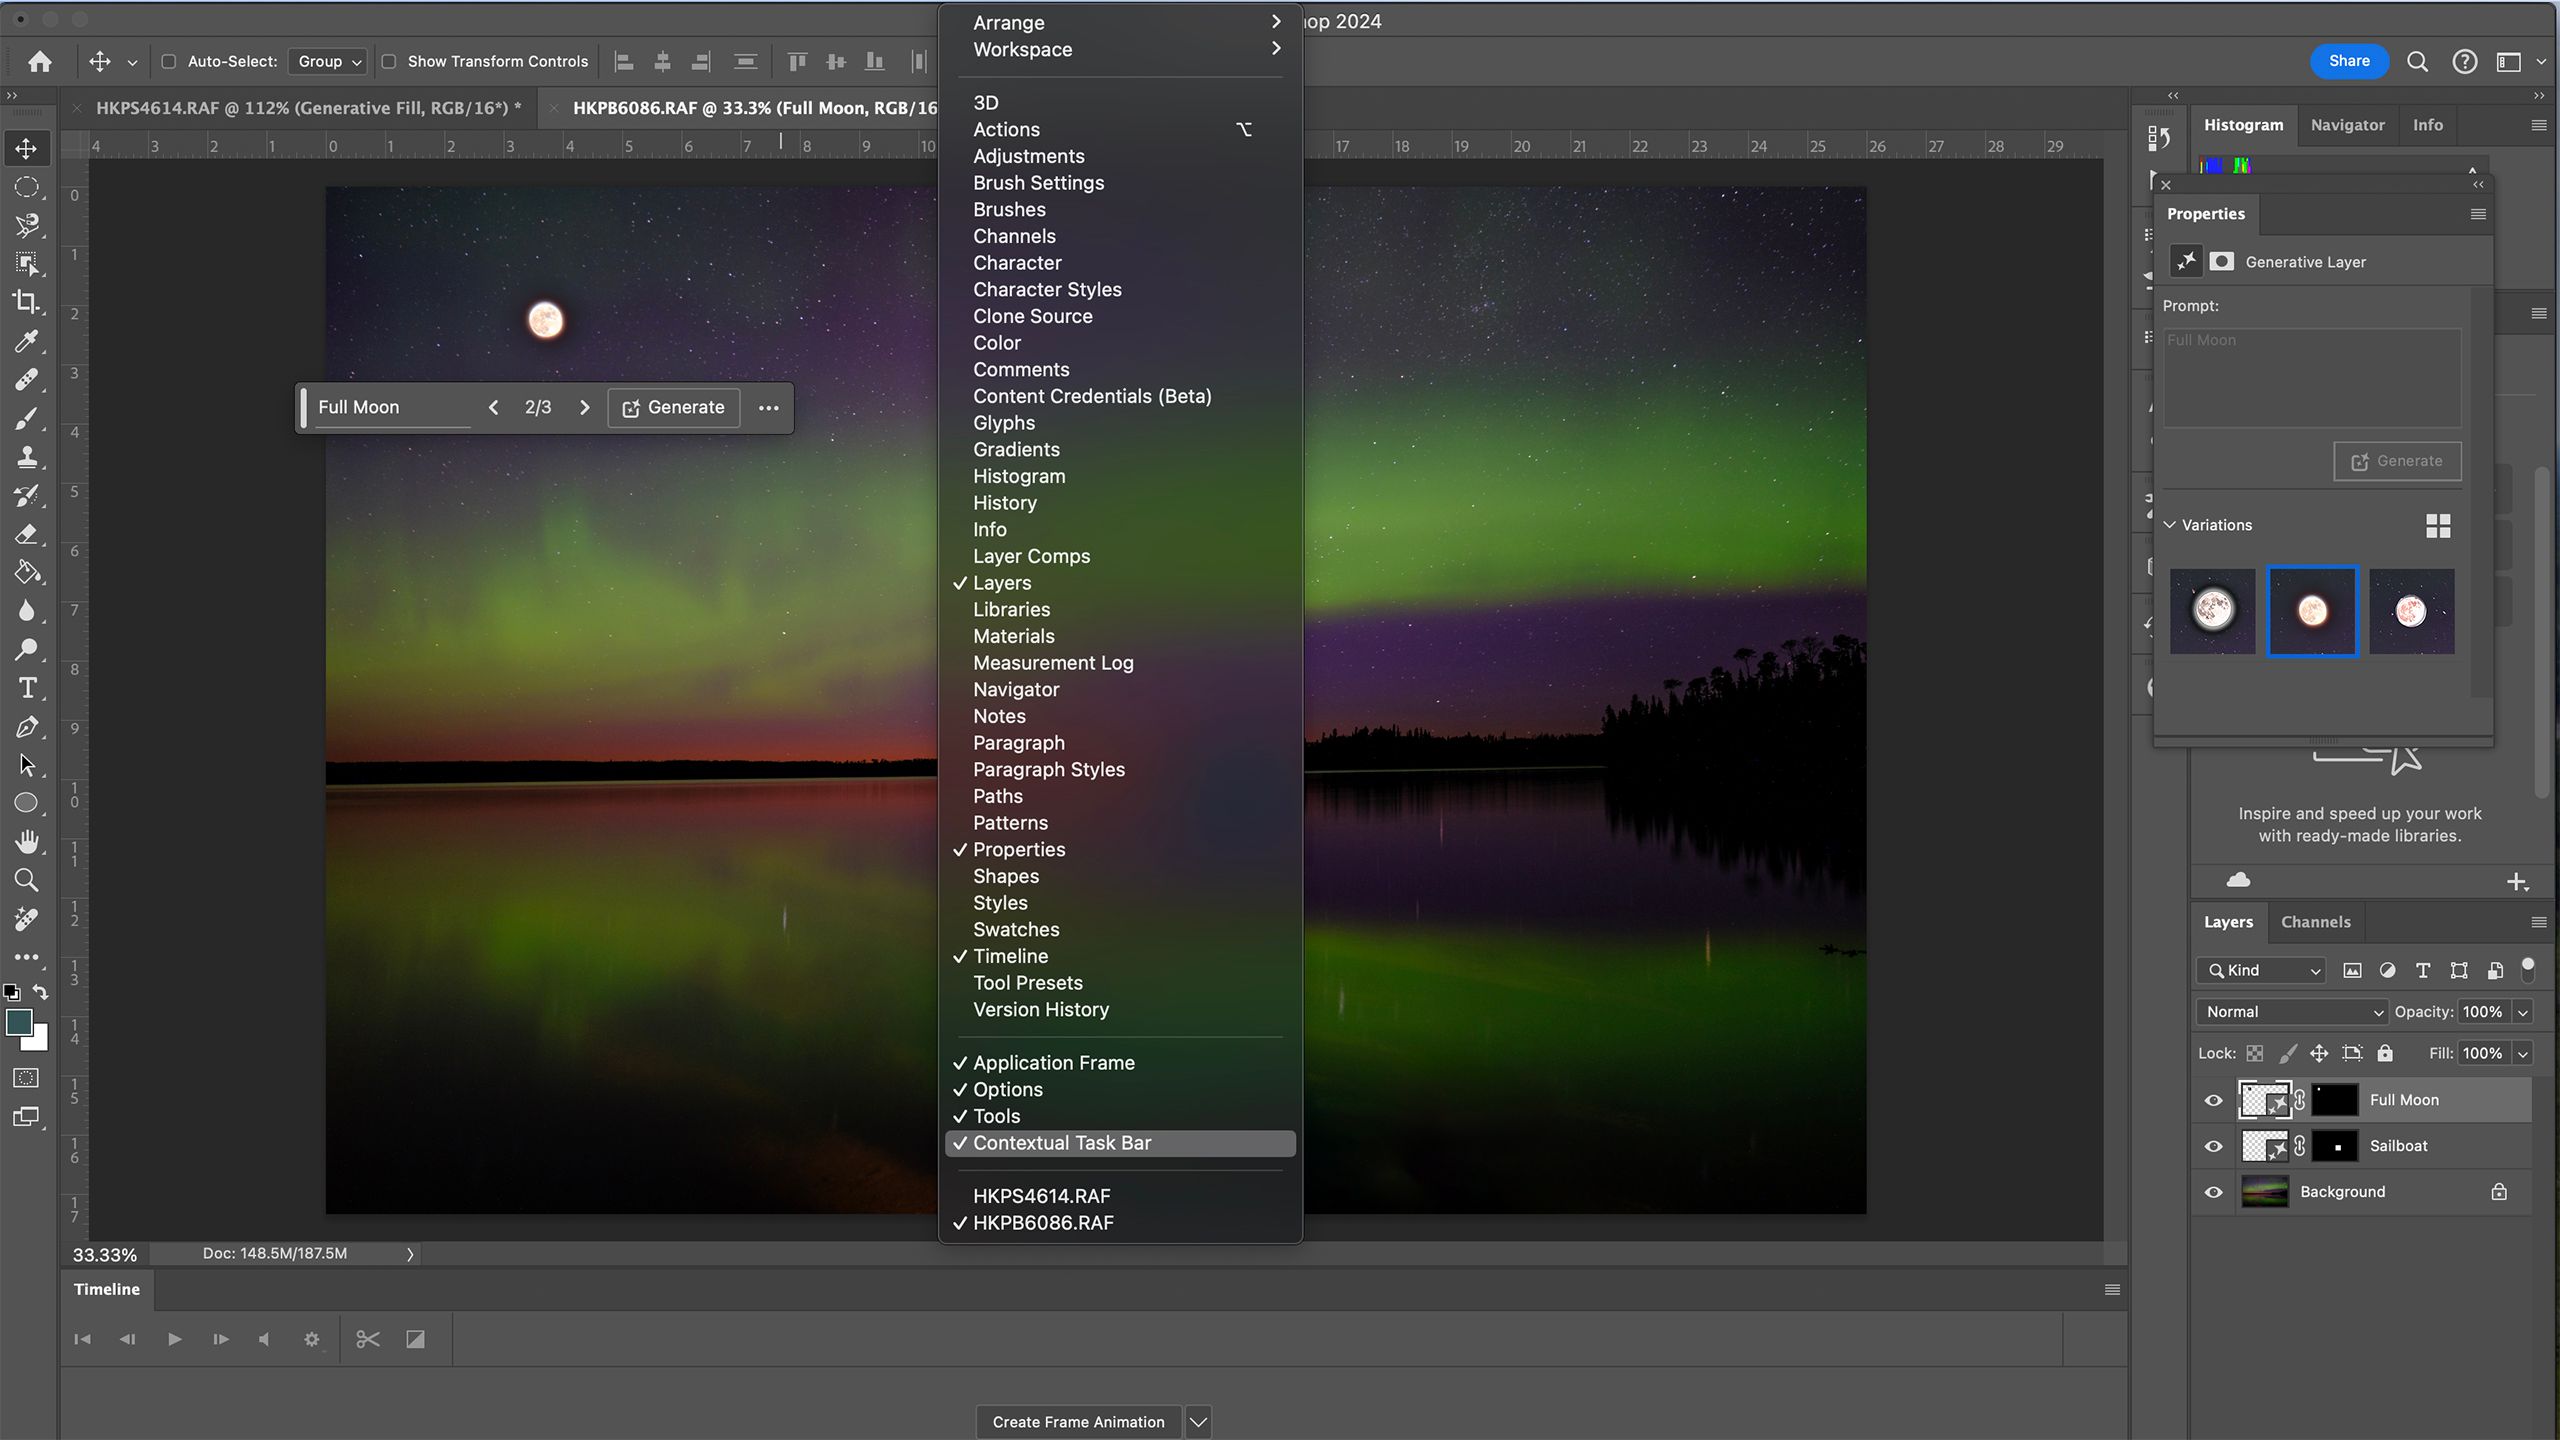
- Once the object or area is selected, click on generative fill on the floating toolbar below your selection. If you do not see this floating toolbar, go to the Window menu and make sure that the contextual task bar is check-marked.
- Use the prompt field to type out a description of what you want to see in that space. Or, if you want to remove an object, leave the prompt field blank.
- Click generate and wait for the progress bar to complete.
- In the properties panel, choose the generation that you like best. If the original options aren’t quite right, hit the generate button again.
- All AI generations will be added as a new layer. This way, you can easily delete or modify the layer at any time.
If you want to remove something from the image and match the empty spot to the background of the image, try using the AI-based Remove Tool instead of Generative Fill. It’s faster and tends to be more accurate.
Adobe Photoshop generative fill tips and tricks
These generative fill prompt tips will increase the odds of getting a better result
While the steps to using Photoshop generative fill are straightforward, what you type into the prompt box isn’t as simple. Using the wrong terms or phrases can result in garbled or undesired results. Adobe lists a few different tips to help users write the most effective prompts, including:
- Be specific and use more than three words. Instead of typing in “a sailboat” try adding more details like “A blue sailboat with a rainbow sail and a sailor on board.”
- Avoid action words. You don’t need to use words like “generate” or “create.” Action words are best left out of the prompt.
- Use emotional words. Adobe encourages artists to use words that describe the desired emotions in the final image. For example, you can use the word “cheerful” or ask the system to generate “a sad golden retriever puppy with big brown eyes.” When generating a person or animal, you can also ask to have the person smiling or frowning.
- Describe the style. Photoshop generative fIll will typically use the surrounding pixels as clues for what to generate. But, if you are starting an illustration from scratch, be specific about the style you are looking for. Ask for a “watercolor” or “sketch,” for example, to get closer to what you are envisioning.
How does Photoshop generative fill work?
The tool uses Adobe Firefly
If you’re wondering how Adobe added a tool that looks a little bit like magic to its app, the secret is something called Adobe Firefly, which is basically the AI model that powers generative fill and other AI-based tools. Adobe’s been working on Firefly for ages, in the same way that Google’s been tinkering on Gemini, and while it’s a hugely complicated model, it works a little like those text-generation models, except for imagery.
A key feature for creatives is that Adobe says the Firefly database is made up of licensed images. Unlike other programs that siphon images from the web, the images used to train Photoshop generative fill were licensed.
Why is Photoshop generative fill not showing up or grayed out?
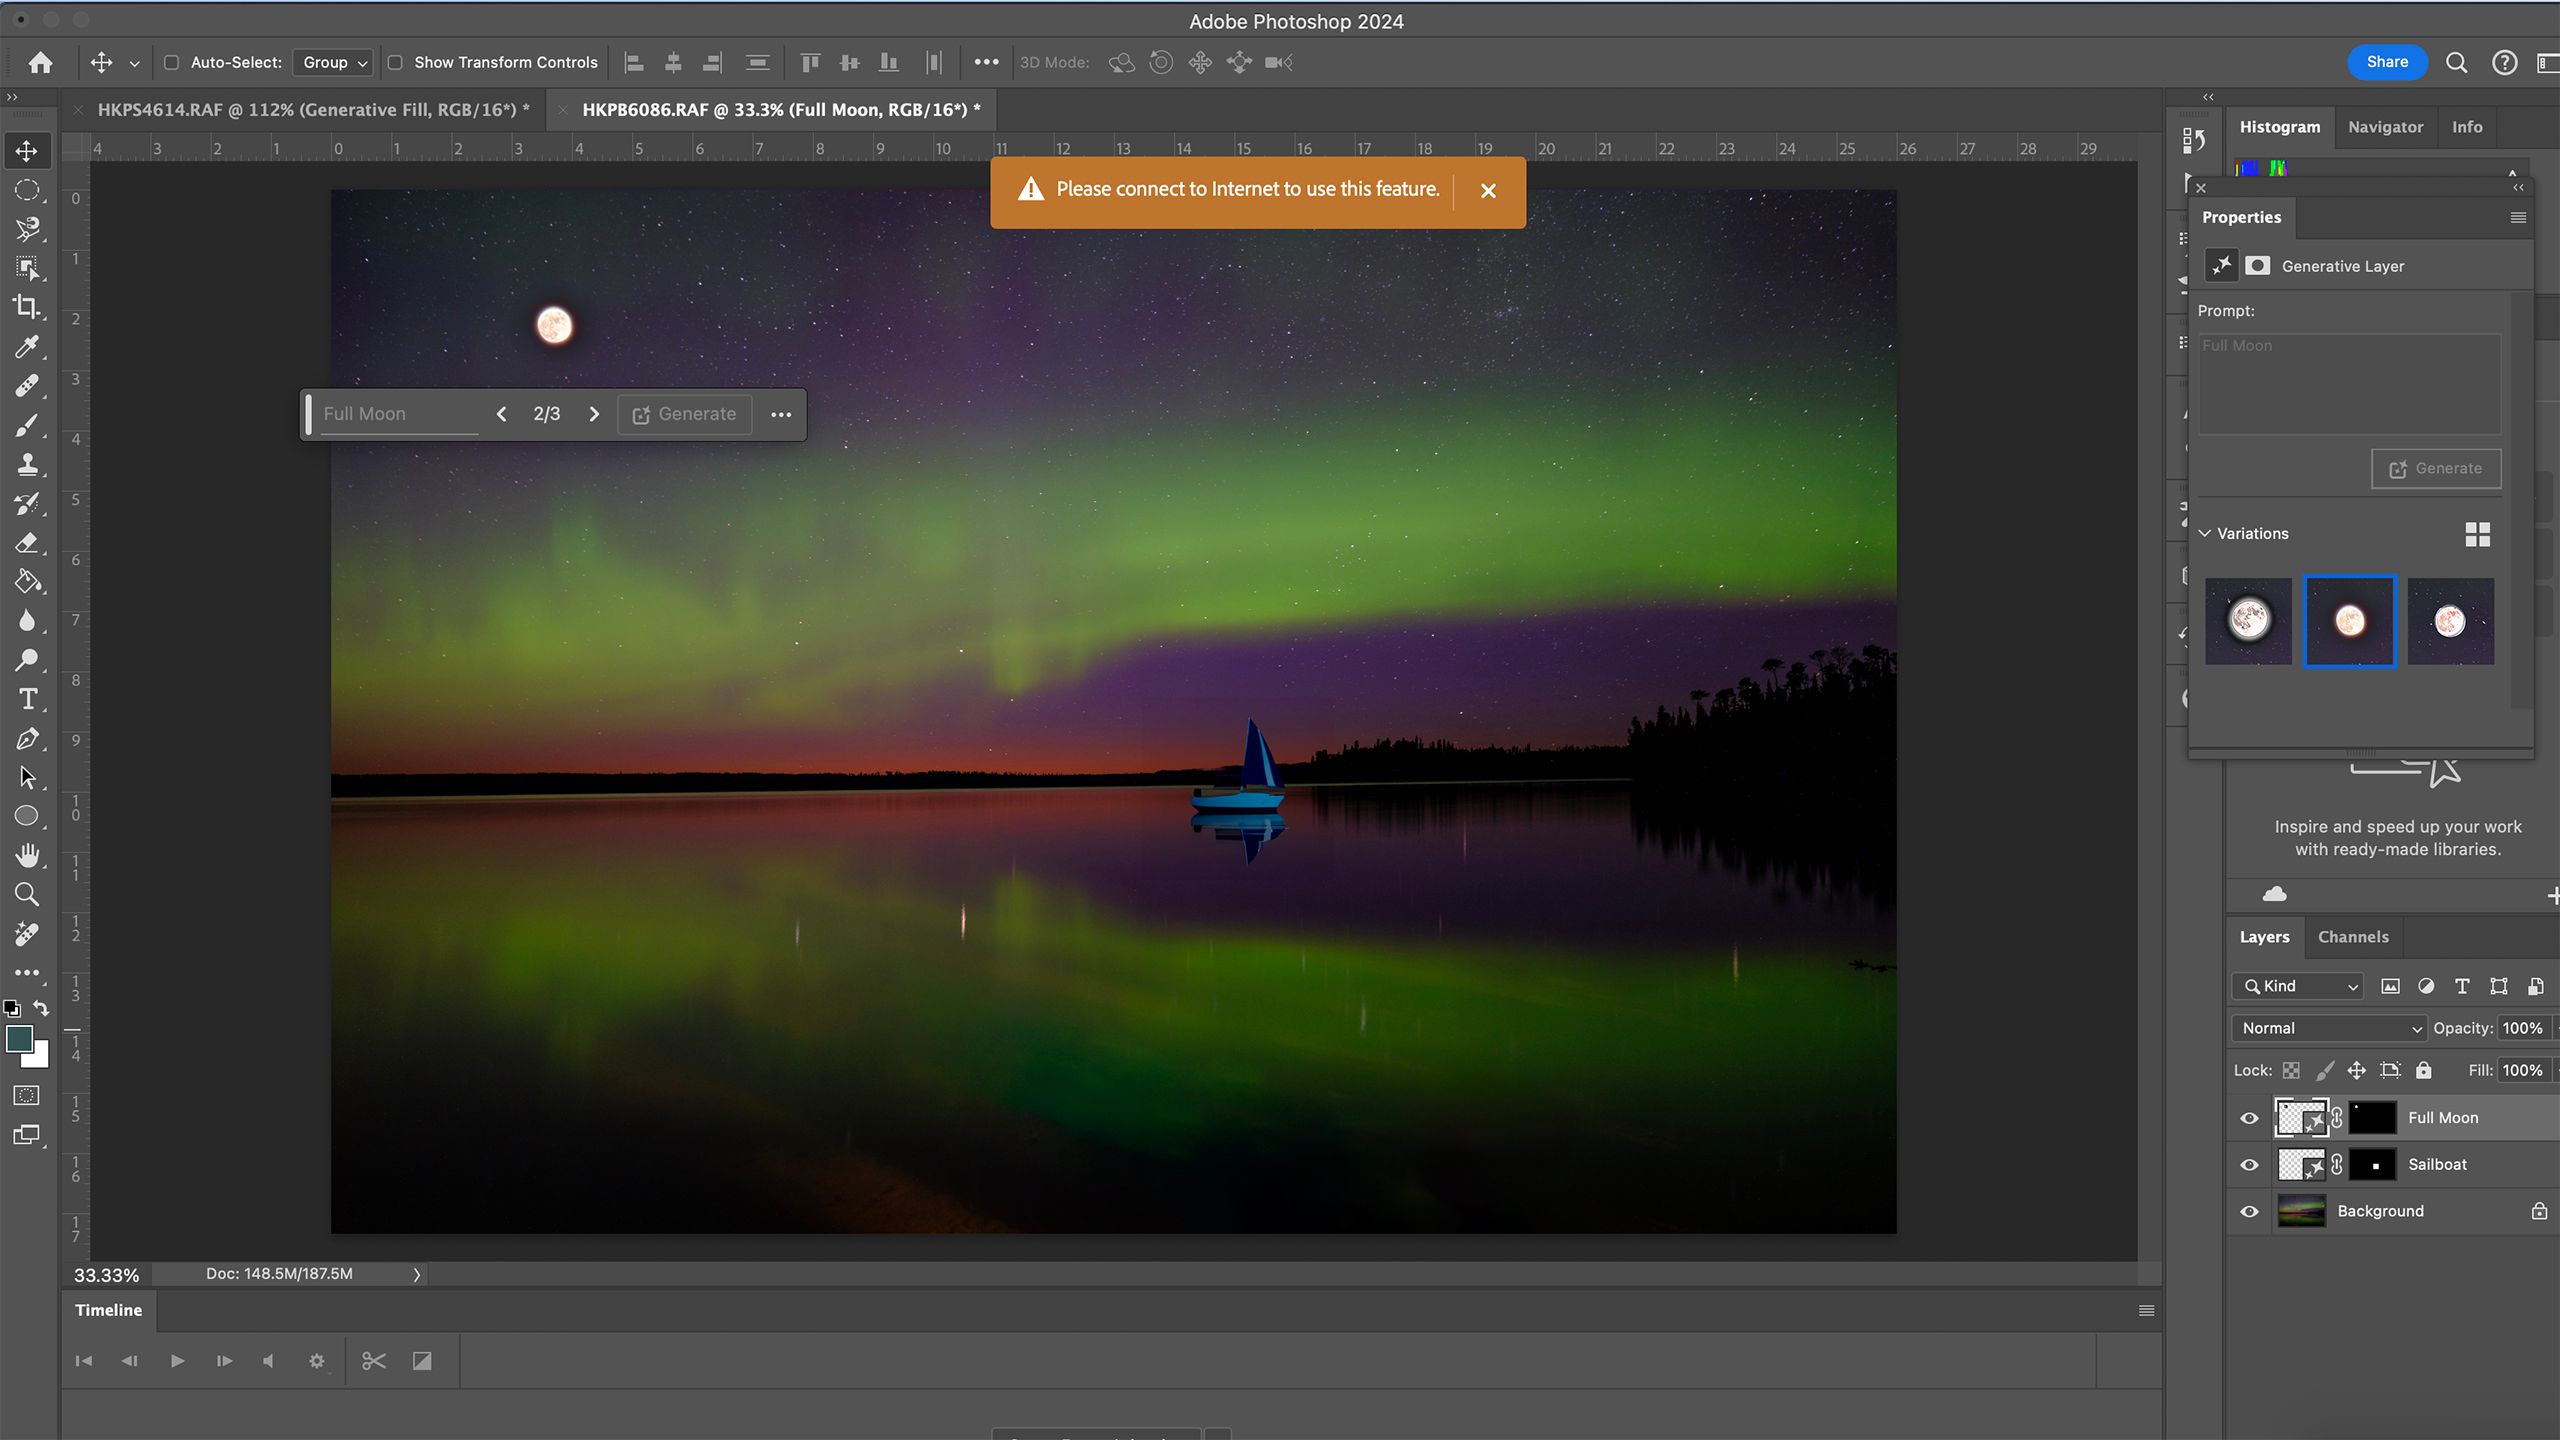
Generative fIll needs an internet connection
The Photoshop Contextual Task Bar that’s used to carry out generative fill is essential to using the tool. If Photoshop generative fill isn’t showing up or grayed out, there could be a number of ways to troubleshoot, depending on the reason the box isn’t appearing in the app:
- Make sure you have an internet connection. The generative fIll option will be grayed out if you do not have an internet connection, as Adobe’s AI is too large to download onto your device.
- Make sure you have the latest version of Photoshop. As a relatively new tool, users may not have the right options for generative fill if the program is outdated.
- Make sure the contextual task bar is turned on. Adobe allows users to turn off the gray taskbar that’s used for Generative Fill, as it can be annoying when you aren’t using the AI. If the task bar isn’t showing up and you have the latest version, click on the Windows menu at the top and make sure the Contextual Task Bar has a check mark next to it.
Can you get Photoshop Generative AI for free?
Not exactly, but you can try out Adobe Firefly for free
Adobe Photoshop is not free software, so outside of the free 7-day trial, you can’t access the generative fill tool for free. However, Adobe Firefly has a web-based version that is free to try out. Using Adobe Firefly on the web doesn’t have the same capabilities as Photoshop, but it can give potential new users an introduction to Adobe’s generative AI. Adobe Firefly’s online tool also serves as a preview of beta features that could be coming to future versions of Photoshop.
Trending Products

Cooler Master MasterBox Q300L Micro-ATX Tower with Magnetic Design Dust Filter, Transparent Acrylic Side Panel, Adjustable I/O & Fully Ventilated Airflow, Black (MCB-Q300L-KANN-S00)

ASUS TUF Gaming GT301 ZAKU II Edition ATX mid-Tower Compact case with Tempered Glass Side Panel, Honeycomb Front Panel, 120mm Aura Addressable RGB Fan, Headphone Hanger,360mm Radiator, Gundam Edition

ASUS TUF Gaming GT501 Mid-Tower Computer Case for up to EATX Motherboards with USB 3.0 Front Panel Cases GT501/GRY/WITH Handle

be quiet! Pure Base 500DX ATX Mid Tower PC case | ARGB | 3 Pre-Installed Pure Wings 2 Fans | Tempered Glass Window | Black | BGW37

ASUS ROG Strix Helios GX601 White Edition RGB Mid-Tower Computer Case for ATX/EATX Motherboards with tempered glass, aluminum frame, GPU braces, 420mm radiator support and Aura Sync


